
You've just been asked for the “latest Outlook contact list.” You export it, open the file, and find duplicate addresses, blank email fields, strange columns, and contacts that Outlook never showed twice in People. Uploading that file directly to a campaign platform is how a simple export becomes a deliverability problem.
The right way to export a contact list from Outlook is to treat the CSV as the first step in a verification workflow, not the finished list. Choose the correct Outlook interface, export only the folder you need, preserve the original file, normalize its fields, remove duplicates, and verify the addresses before sending.
Table of Contents
- Why Exporting Outlook Contacts Is Only Half the Job
- Exporting Contacts from Classic Outlook on Windows
- Exporting Contacts from Outlook on the Web and New Outlook
- CSV vs vCard Choosing the Right Export Format
- Field Mapping and CSV Normalization Before You Upload
- Removing Duplicates and Prepping for Verification
- Handing the File to a Verifier and Closing the Loop
Why Exporting Outlook Contacts Is Only Half the Job
An Outlook export answers one question: what records can Outlook place into a transferable file? It doesn't answer whether each address is usable, whether two records represent the same person, or whether the columns will import correctly into your next system.
That distinction matters for newsletters, sales outreach, customer lifecycle campaigns, and CRM migrations. A stale address, malformed field, duplicate recipient, or hidden personal contact can affect list quality and create avoidable delivery problems. The CSV Outlook produces is a raw data extract. Treat it as your source copy, not as a campaign-ready audience.
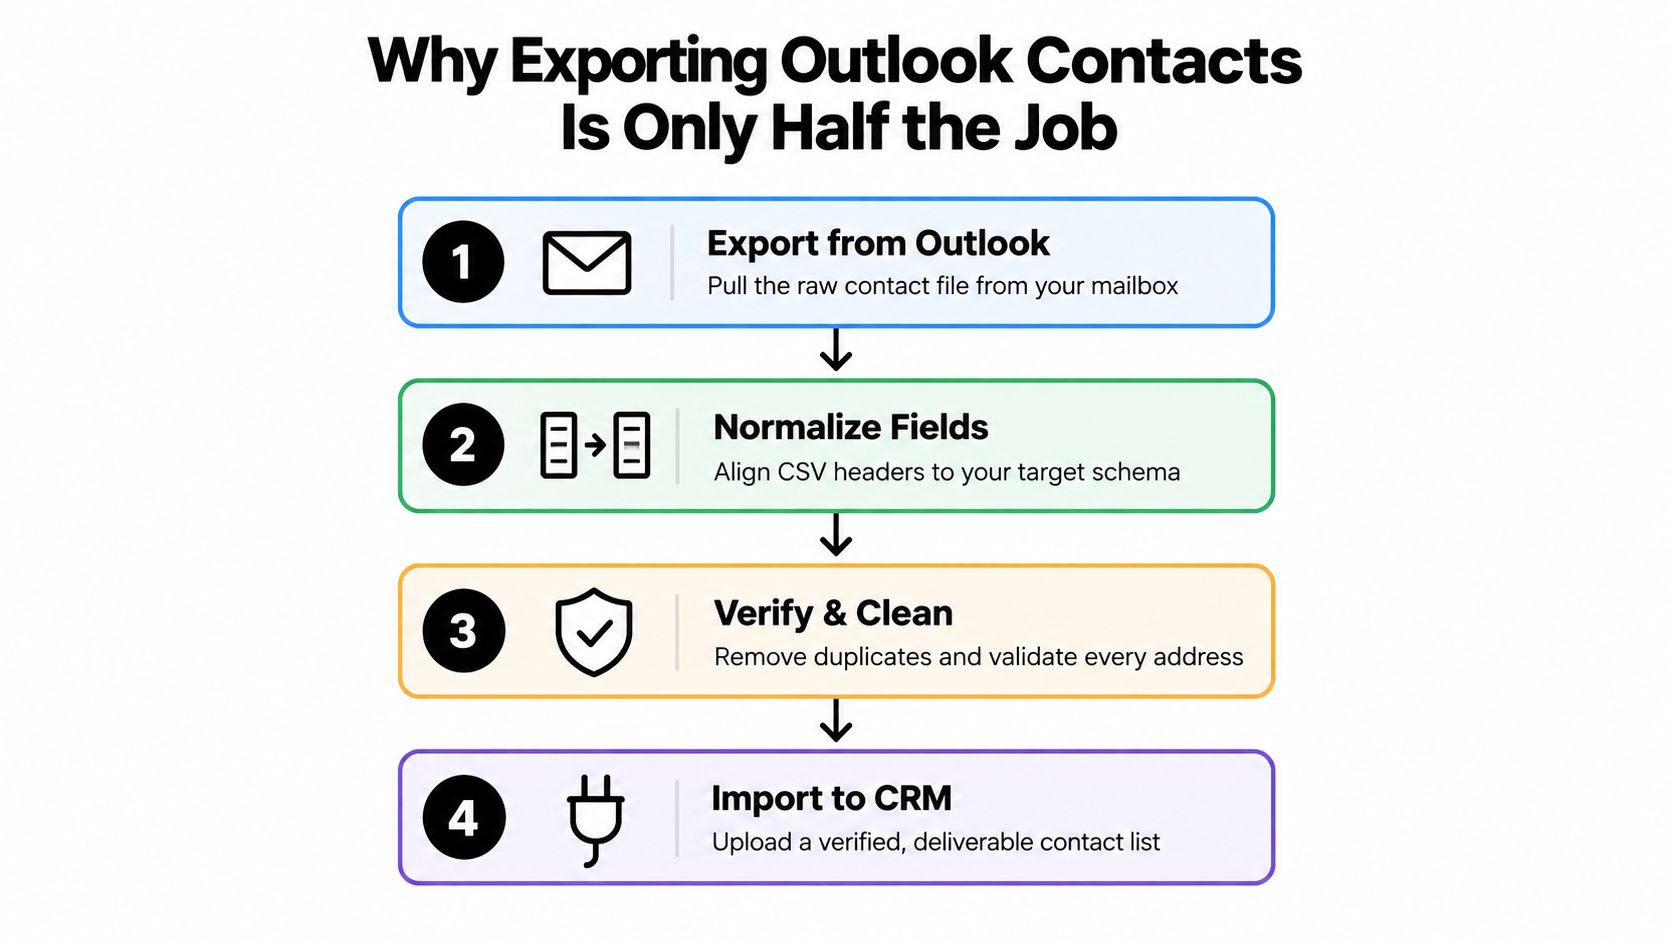
The workflow has four stages:
- Export the right records from classic Outlook, New Outlook, Outlook on the web, or Outlook.com.
- Normalize the CSV so headers, delimiters, email fields, and text values remain usable.
- Clean and verify the list without editing the untouched source file.
- Import only the reviewed output into your CRM, verifier, or campaign platform.
Microsoft documents CSV as the practical format for contacts-only exports, while PST is intended for broader Outlook data. CSV also gives you a row-and-column file that spreadsheet tools, CRM systems, and verification services can read. That makes it the sensible choice when the next action is list cleanup or migration rather than restoring an entire Outlook environment. Microsoft's Outlook export guidance distinguishes the contacts-only CSV path from PST backup.
The rest of the process should be deliberately boring. Export the precise folder, save the original, inspect the data, deduplicate by email address, and only then hand the cleaned copy to a verification service. That sequence prevents Outlook's convenient interface from becoming a source of false confidence.
Exporting Contacts from Classic Outlook on Windows
Classic Outlook's Import/Export wizard is reliable, but the folder choice determines whether the resulting file is useful. Contacts may sit across several accounts and folders, so the wrong selection can combine personal entries with vendors, customers, and prospects before verification begins.
Follow the desktop wizard
Use this sequence:
- Select File.
- Open Open & Export.
- Choose Import/Export.
- Select Export to a file.
- Choose Comma Separated Values.
- Select the relevant Contacts folder.
- Set the destination and filename.
- Select Finish.
Outlook editions may use slightly different labels, but the workflow stays consistent. Select CSV for a portable contact list that another system, spreadsheet, or verifier can read. Select PST for a broader Outlook data backup. The earlier Microsoft guidance covers this distinction in its classic Outlook contact export instructions.
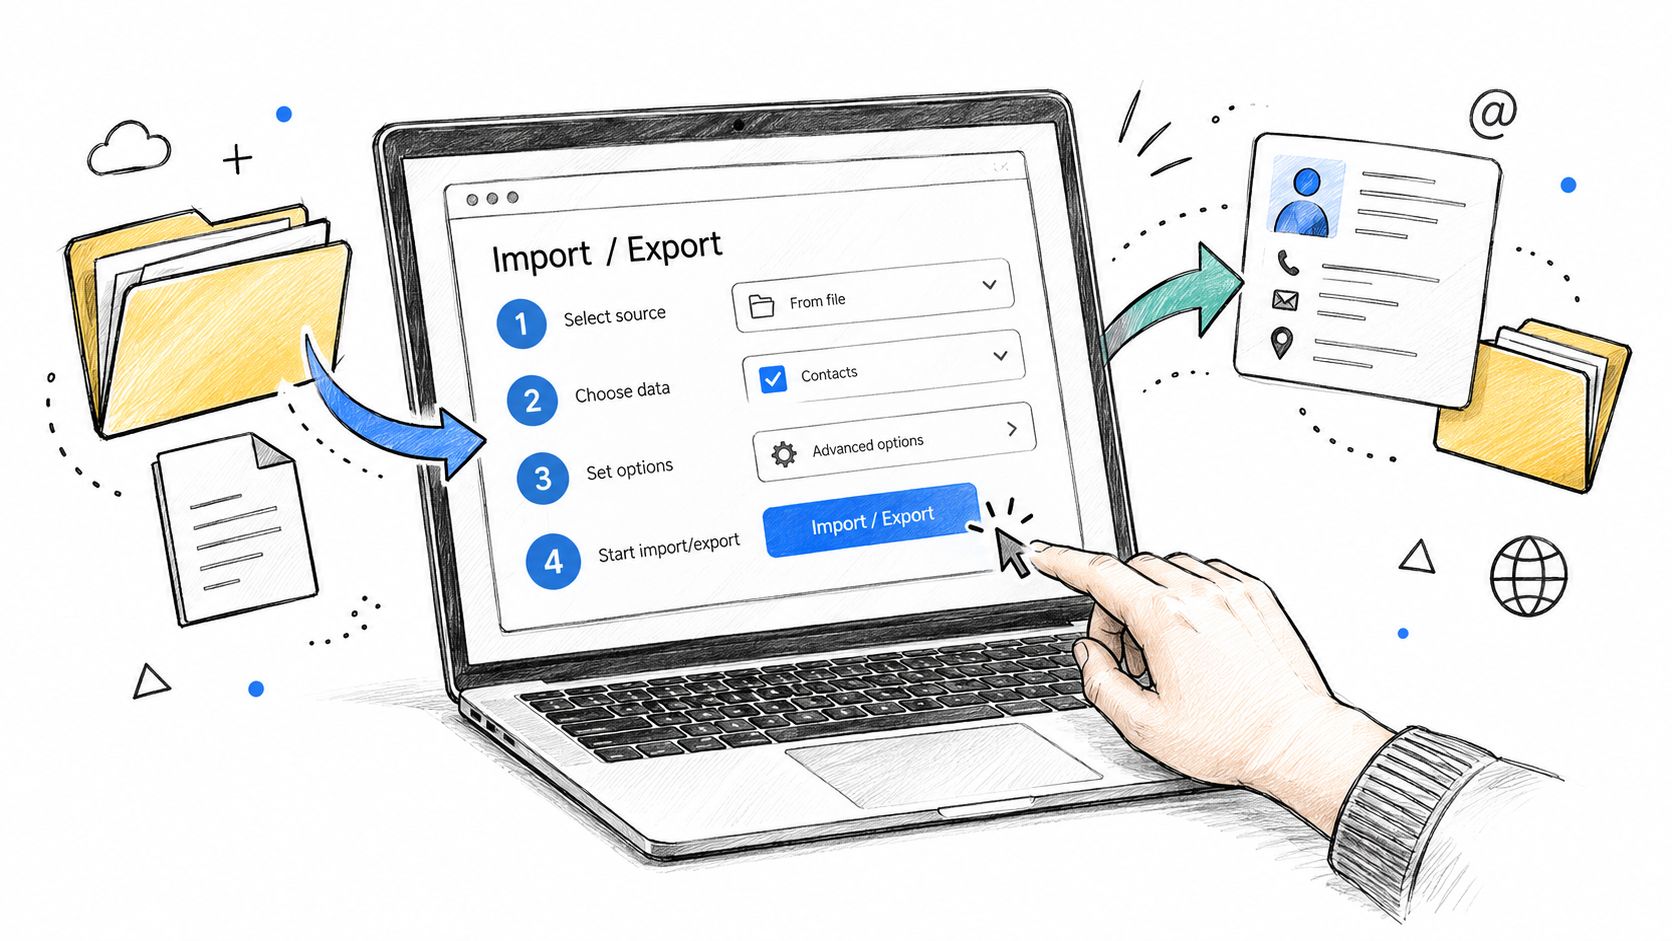
Before you select Finish, expand the account and folder tree. If marketing contacts are stored in a dedicated folder, export that folder rather than the general Contacts folder. A narrow export keeps personal addresses and unrelated records out of the verification workflow.
Practical rule: Name the file for its source and purpose, such as
newsletter-contacts-outlook-original.csv. Don't overwrite it when you begin cleanup.
Save the export where your team can find and protect it, then create a working copy for normalization. Spreadsheet editors can alter delimiters, encoding, or field formatting, while deduplication can remove records that require review. Keeping the original gives you a dependable comparison file.
Review the folder choice and format before watching this visual walkthrough of the wizard:
The separate CSV is now ready for inspection, filtering, field mapping, and verification. Because these operations run on the exported file, you can test cleanup rules and validation passes without changing Outlook's address book. A flawed pass remains recoverable.
Exporting Contacts from Outlook on the Web and New Outlook
The web-based experience is shorter and centers on People rather than the classic Import/Export wizard. Use this path in Outlook on the web, Outlook.com, and the newer Outlook experience where the People area is available.
Open People, select Manage contacts, and choose Export contacts. Microsoft's documented flow then lets you choose All contacts or contacts from a specific folder before selecting Export. The resulting file is saved as a CSV in your computer's Downloads folder, as described in Microsoft's web and New Outlook contact export guidance.

Export the narrowest useful folder
The choice between All contacts and a folder is more important than the number of clicks. If the file is for a newsletter, select the newsletter folder. If it's for a sales sequence, select the prospect folder. Exporting a controlled subset reduces the chance that a personal address or unrelated contact reaches the next system.
New Outlook for Windows follows a closely related route. Open People, choose Export contacts from the ribbon, select the option under Contacts from this folder, and select Export. The interface is different from classic Outlook, but the operating principle is identical: confirm the source folder before you create the file.
Because the browser normally places the result in Downloads, rename the file immediately after export. Use a name that identifies the account, folder, and purpose, then move the untouched file into your source folder. Make a separate working copy before opening it in a spreadsheet editor.
This route is convenient, but convenience doesn't remove the need for inspection. The People view can present a tidy list while the exported CSV contains records you weren't expecting, including duplicates or contacts from a broader folder scope. Export selection is your first quality control step, not the last.
CSV vs vCard Choosing the Right Export Format
CSV and vCard solve different problems. CSV is a table designed for bulk handling. vCard is a contact-card format designed to preserve structured contact details for sharing or synchronization.
Choose CSV when each contact needs to become a row in a CRM, spreadsheet, segmentation file, or email verification upload. It gives you visible columns for names, companies, and email fields, which makes filtering and validation practical. It also lets you inspect the file before another system interprets it.
Choose vCard for one-off contact sharing, phone synchronization, or situations where preserving several phone numbers, addresses, and richer contact-card fields matters more than bulk list operations. A vCard isn't naturally a single email column, so it usually needs conversion before a verifier or campaign tool can process it cleanly.
| Use case | Best format | Why |
|---|---|---|
| CRM migration | CSV | Rows and columns map more naturally to CRM fields. |
| Email verification | CSV | Email addresses can be isolated, reviewed, and checked in bulk. |
| Spreadsheet cleanup | CSV | Filters and field-level edits are straightforward. |
| Phone synchronization | vCard | Structured contact details transfer more naturally. |
| Sharing one contact | vCard | The contact card can preserve richer personal details. |
The shared basics are usually familiar: name, email, and company. The difference appears when one contact has several email addresses or multiple phone numbers. CSV may place those values into separate fields or export them in a form that requires cleanup, while vCard keeps the contact-card structure but doesn't automatically produce the flat table a verifier expects.
Before uploading a CSV, check the receiving service's supported file types and limits. The best format is the one that matches the next operation. For bulk email quality work, that is normally CSV.
Field Mapping and CSV Normalization Before You Upload
The export is only useful if the receiving system understands its columns. Outlook's import workflow includes Map Custom Fields, a direct reminder that exported headers don't always align with the destination schema. Microsoft explains that fields can be omitted or placed incorrectly when names don't match, and that explicit mapping is available when automatic matching fails in its field-mapping documentation.
Preserve the source and create a working copy
Keep the untouched export unchanged. Create a normalized copy, then work only on that copy. This gives you a reliable comparison point when a row disappears, a value changes, or a spreadsheet application rewrites the file.
Start with the headers. Decide which column is the primary email field, rename inconsistent headers to match your destination, and keep secondary email fields separate. Don't combine multiple addresses into one semicolon-separated cell if the receiving platform expects one address per row or a defined email column.
Use a CSV-aware editor or a plain-text editor for the first inspection. Excel can be useful for review, but it may reinterpret values and formatting without warning. Check that the delimiter is consistent, quoted commas remain inside the correct field, and company names containing commas haven't shifted later columns. This guide to opening CSV files is useful when you need to inspect the file without treating every visible value as a spreadsheet number.
Normalize fields that quietly break
- Email addresses: Preserve plus tags and the complete address as text. Don't trim meaningful characters.
- Names: Keep non-ASCII characters intact. A name shouldn't be damaged because an editor assumes a different encoding.
- Identifiers: Protect leading zeros in unrelated fields. They may be meaningful even though they aren't email data.
- Multiple addresses: Put each email field in its own clearly named column, then decide which one is primary.
- Delimiters: Confirm that the file uses one consistent separator throughout.
- Quoted values: Check names and company fields containing commas or quotation marks.
- Blank cells: Flag missing email values instead of allowing them to flow into a verification upload.
Field mapping is a data decision, not a cosmetic edit. A familiar-looking header can still point to the wrong destination field.
Finally, compare the row count in the untouched export with the normalized copy. A difference isn't automatically wrong, but it must be explainable. If you're also preparing structured catalog data, the same discipline applies when you boost Amazon listing performance, because flat files fail when headers, delimiters, and values aren't handled consistently.

Removing Duplicates and Prepping for Verification
A clean People view doesn't guarantee a clean export. Microsoft notes that New Outlook and web Outlook can hide exact or proper-subset duplicates in the interface, while an export can still contain every duplicate record. Microsoft also warns that importing contact files can create duplicates rather than reliably merging them, as documented in its guidance on managing duplicate contacts in Outlook.
That is the trap. Outlook's screen is optimized for contact management, not for proving that a campaign file contains one usable record per address.
Deduplicate by the email field
Use the normalized copy and standardize the email column before comparing values. A practical first pass is case-insensitive matching, so the same address written with different capitalization isn't treated as two separate recipients. Keep the first record only when the other fields agree, but don't automatically discard every conflicting row.
If two records share an address while showing different names or companies, send them to a review group. The shared address may represent a changed role, an outdated company record, or two internal records that need one authoritative owner. Deleting one without checking the context can remove useful data.
Review records with multiple addresses separately. Decide whether the secondary address belongs in the verification file, a different audience, or a suppressed archive. A verifier can assess an address, but it can't decide which person or business relationship your team intends to retain.
Use a pre-verification checklist
Before uploading, mark the following items:
- Blank email cells: Remove them from the verification input or place them in a separate review file.
- Role accounts: Flag addresses such as shared departmental inboxes for a deliberate sending decision.
- Disposable domains: Mark them for verification review rather than assuming they belong in a long-term list.
- Malformed values: Check missing domains, stray spaces, broken separators, and incomplete addresses.
- Duplicate addresses: Deduplicate without regard to capitalization.
- Conflicting records: Review names and companies that differ for the same address.
- Source integrity: Keep the untouched export and retain the normalized copy separately.
A fresh count before upload gives you a final reconciliation point. The number isn't meaningful by itself. What matters is that you can explain what changed between Outlook's export, the normalized file, and the verification input. For practical cleanup patterns, use this CSV email list guide.
Handing the File to a Verifier and Closing the Loop
The repeatable routine is simple: export, preserve, normalize, deduplicate, verify, and sync. Verification belongs after structural cleanup because a service can evaluate an address, but it can't repair a wrongly mapped company field or decide whether two conflicting records represent the same customer.
A deliverability-focused verifier should inspect more than syntax. CleanMyList evaluates eight signals: syntax, DNS, SMTP mailbox existence, catch-all behavior, disposable providers, role accounts, historical bounce reputation, and a final send-or-skip recommendation. Those checks separate obvious formatting problems from addresses that look valid but deserve caution.
The operational details matter as well. CleanMyList uses credit bundles starting at $6, gives new accounts 50 free credits without requiring a card, and lets credits remain available without expiration. It doesn't send email during verification, encrypts data in transit and at rest, and deletes uploaded lists after 30 days. These controls help teams review a list without turning verification into an outbound campaign.
Don't treat verification as permanent certification. A list that was acceptable at export can age as people change roles, abandon inboxes, or switch providers. Re-run older lists before important sends, then keep the verified output separate from the original Outlook export. For future signup protection, a one-line widget can block obvious typos and fake addresses before they enter the database.
Use CleanMyList to verify the normalized CSV, identify risky addresses, and export a cleaner file for your CRM or campaign platform. Start with the Outlook export you already have, preserve the original, and upload only the reviewed copy so hidden duplicates and malformed fields don't follow you into your next send.